How to Lay a Concrete Shed Base
A step-by-step UK guide using ready-mix concrete, from marking out, through sub-base prep and shuttering, to pour, finish and cure. The base that outlasts the shed.
The Short Answer
How do you lay a concrete shed base?
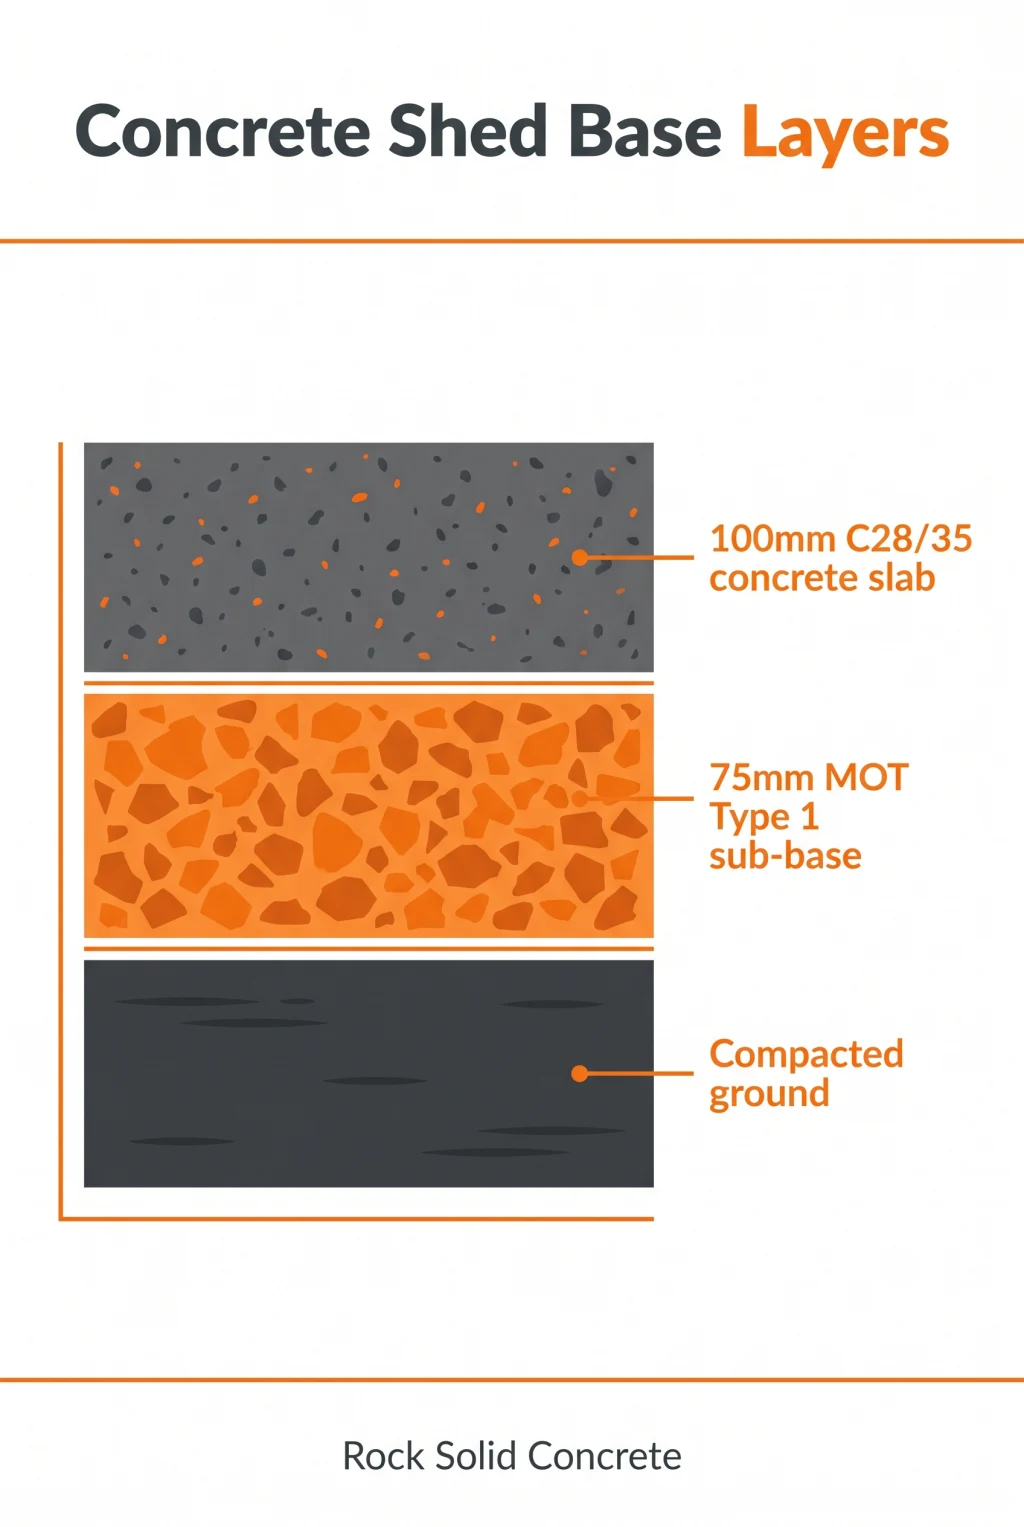
Mark out the area, dig down 175mm, lay 75mm of compacted MOT Type 1 sub-base, set up timber shuttering, and pour C28/35 ready-mix concrete at 100mm depth. Level with a tamping board, smooth with a steel float, and cover for at least 3 days while it cures. Wait 7 days before putting the shed on it. Below is the full step-by-step.
What You'll Need
Materials and tools
Materials
- C28/35 ready-mix concrete, order from Rock Solid, 1m³ minimum
- MOT Type 1 sub-base, ~75mm depth, available bagged or in bulk
- Treated timber, 100×25mm for shuttering
- Wooden pegs, every 600mm on shuttering
- 75mm screws, fix shuttering to pegs
- DPM (damp-proof membrane), optional, for damp ground
- A142 steel mesh, optional, for bases over 12m² or heavy loads
Tools
- Spade and shovel, for digging out
- Wheelbarrow, for moving concrete from chute
- Wacker plate or hand tamper, to compact the sub-base
- Spirit level, at least 1m long
- Tape measure, for marking out and depth checks
- Rake, to spread concrete to roughly level
- Tamping board, straight timber, longer than slab is wide
- Steel float, for finishing the surface
The Method
11-step guide to laying a concrete shed base
- 01
Mark out and check the area
Mark out your shed base with stakes and string line, at least 50mm larger than the shed footprint on each side. Check the area is roughly level and free of large roots. The base should be on solid ground, ideally undisturbed soil; avoid laying directly over loose topsoil.
- 02
Excavate to the required depth
Dig down 175mm below the desired finished slab level (75mm sub-base + 100mm concrete). Square the corners. The excavated base should be flat, not perfectly level, but no high spots more than 25mm out.
- 03
Lay and compact the sub-base
Spread MOT Type 1 to a depth of 75mm. Rake it flat. Wet it lightly and compact with a wacker plate or hand tamper. Compaction is important, under-compacted sub-base settles unevenly and cracks the slab.
- 04
Set up shuttering
Cut treated timber to the dimensions of your slab. Drive wooden pegs every 600mm on the outside of each board, screw the boards to the pegs at the correct slab height. Check level along and across, small adjustments now prevent a sloping shed later.
- 05
Lay DPM and mesh (optional)
For shed bases sitting in damp ground, lap a DPM over the sub-base and turn up at the edges. For bases larger than 12m² or carrying heavy loads (workshop, gym), lay A142 mesh on small bricks or chairs so it sits 50mm above the sub-base.
- 06
Order ready-mix C28/35 concrete
Calculate volume: length × width × 0.1 (for 100mm depth), plus 10% wastage. A typical 8×6ft shed needs ~1.0m³; a 10×8ft shed ~1.5m³. Order C28/35 ready-mix from 1m³, far stronger and more consistent than DIY bag mix.
- 07
Pour and spread the concrete
Discharge the concrete into the shuttered area starting at the back corner. Spread with a rake to roughly the right level. Work in sections, fresh concrete starts to stiffen after 30-45 minutes, so don't pour faster than you can finish.
- 08
Level and tamp
Use a straight timber edge (longer than the slab is wide) on top of the shuttering. Drag it across the surface in a sawing motion to strike off excess concrete and level the slab. Tamp lightly to compact and bring fines to the surface.
- 09
Float and finish
Once the surface water has disappeared (15-30 minutes after pouring), use a steel float or wood float to smooth the surface. For a shed base, a float finish is fine, no need to power-trowel. Avoid overworking the surface; that brings excess water up and weakens the top layer.
- 10
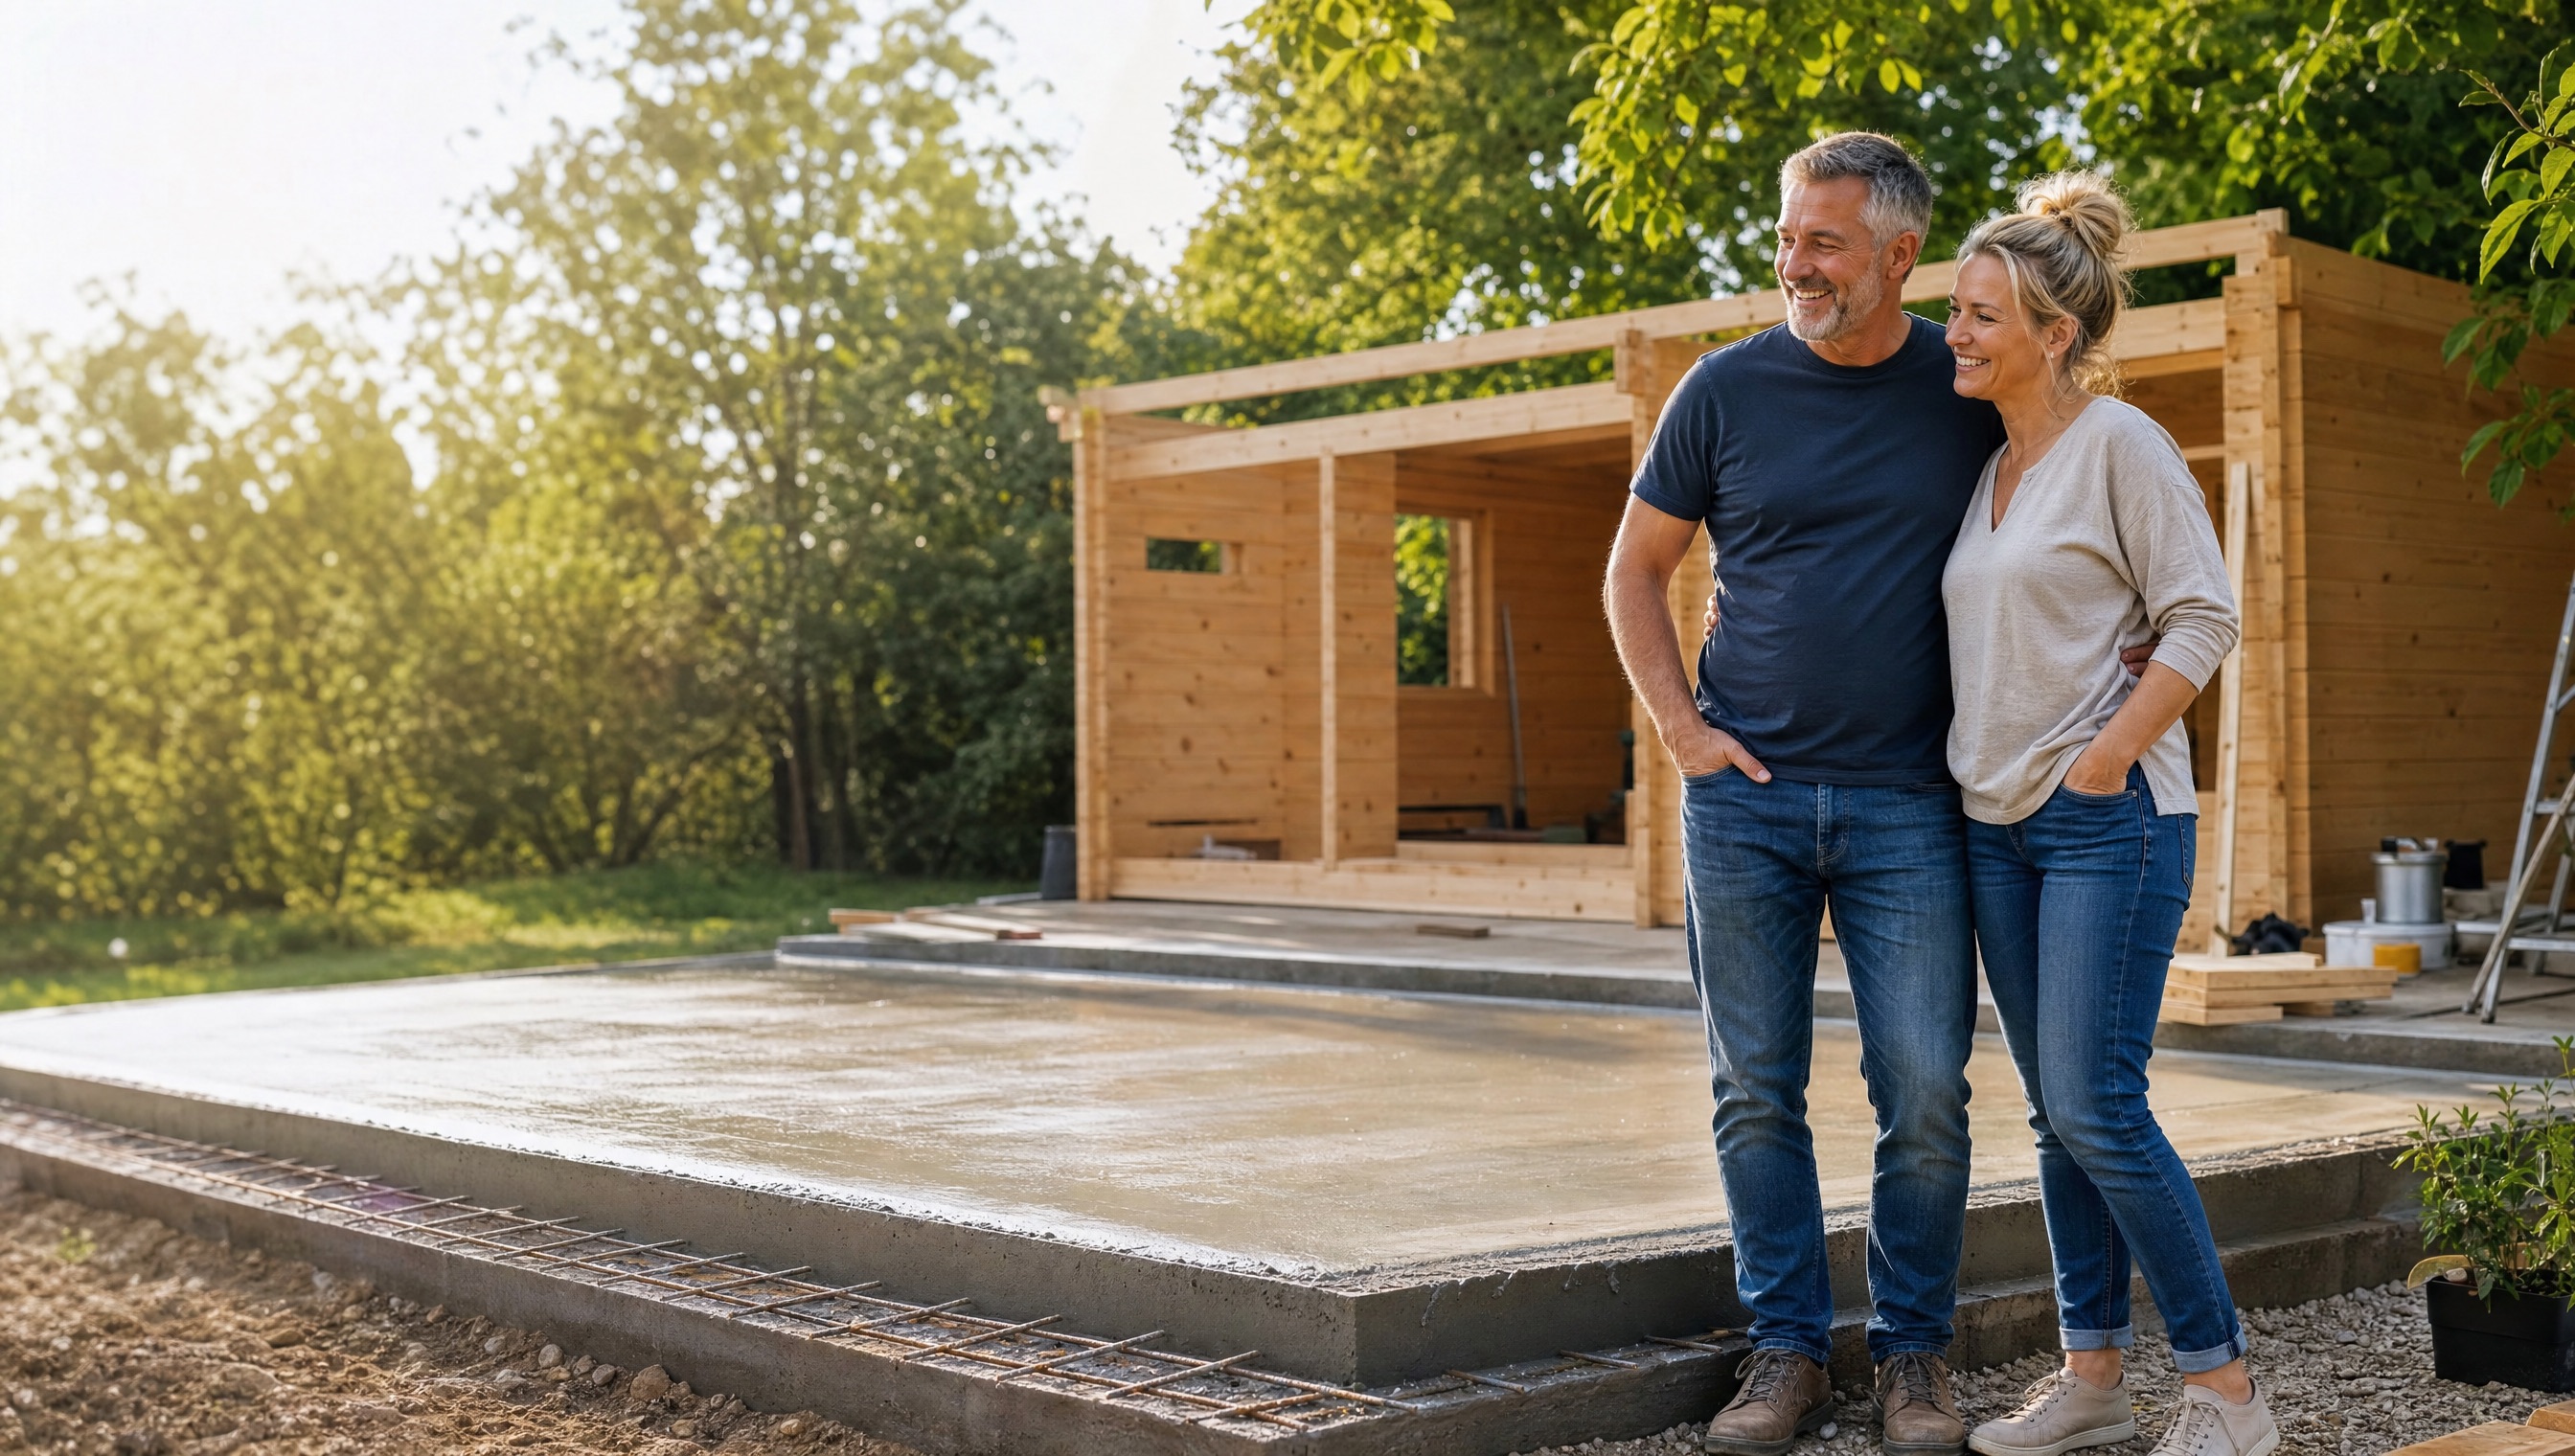
Cover and cure
Cover the slab with polythene or hessian for at least 3 days, kept damp in hot weather. Don't walk on it for 24-48 hours. Don't put the shed on it for at least 7 days (concrete reaches ~70% strength at 7 days). Full design strength at 28 days.
- 11
Strike the shuttering
After 48 hours, unscrew the timber shuttering and remove. Backfill any gap around the slab with soil or gravel. The base is ready for the shed once it's been curing for a full week.
When You're Ready to Pour
Order C28/35 ready-mix concrete from 1m³
Skip the bag-mixing. Ready-mix concrete is roughly twice the strength of postcrete or DIY bag mix, batched to BS EN 206 / BS 8500 spec, and delivered in 1m³ or larger loads with no small-load surcharge.
Pick your shed dimensions on our shed base concrete page, the calculator works out your exact volume, and you'll see the live price with VAT and delivery included.
FAQ
Common questions on concrete shed bases
How thick should a concrete shed base be?
100mm (4 inches) of C28/35 ready-mix concrete on top of 75mm of compacted MOT Type 1 sub-base is the standard spec for a domestic shed base. For heavy garden buildings (log cabins, garden offices, workshops) increase to 150mm. For greenhouses and lightweight summerhouses, 75mm is usually sufficient.
What mix of concrete is best for a shed base?
C28/35 is the best general-purpose mix for a shed base, high enough strength to handle the weight of any garden building, frost-resistant, and won't crack under normal use. It's roughly twice the strength of a DIY postcrete bag mix. Order ready-mix from 1m³ minimum, cheaper and stronger than mixing on site.
How much concrete do I need for a shed base?
Calculate length × width × depth (in metres), plus 10% wastage. A standard 8×6ft (2.4×1.8m) shed base at 100mm depth needs ~0.5m³. A 10×8ft (3×2.4m) base needs ~0.8m³. A 12×10ft (3.6×3m) base needs ~1.2m³. Use our online concrete calculator for an exact figure.
How long before I can put the shed on a concrete base?
Wait at least 7 days before placing a shed on a freshly poured concrete base. At 7 days, concrete has reached ~70% of its design strength, enough to take the load of a typical garden shed. Full design strength is reached at 28 days; for heavy buildings (log cabins, workshops with machinery) wait the full 28 days.
Do I need a sub-base under a concrete shed base?
Yes. A 75mm compacted MOT Type 1 sub-base prevents the slab from settling unevenly, drains water away from the underside, and stops the slab from cracking under load. Pouring concrete directly on undisturbed clay or topsoil is the most common cause of long-term shed-base failure.
Should the shed base be bigger than the shed?
Yes, at least 50mm larger than the shed footprint on each side. This keeps water dripping off the eaves clear of the timber base, extends the life of the shed, and prevents soil splash-back staining the bottom of the cladding. For sheds in exposed locations, 100mm overhang is even better.
Can I lay a shed base in winter?
Yes, but you need to protect the pour from frost for the first 48-72 hours. Don't pour if frost is forecast within 24 hours; cover the slab with hessian and polythene; consider asking us to add an accelerator to the mix at order time. We don't deliver if ground temperature is below 2°C.
Related Guides
More on concrete bases and DIY pours
Ready to order your shed base concrete?
1m³ minimum, no surcharge. Volumetric wagons mean you only pay for what's poured.